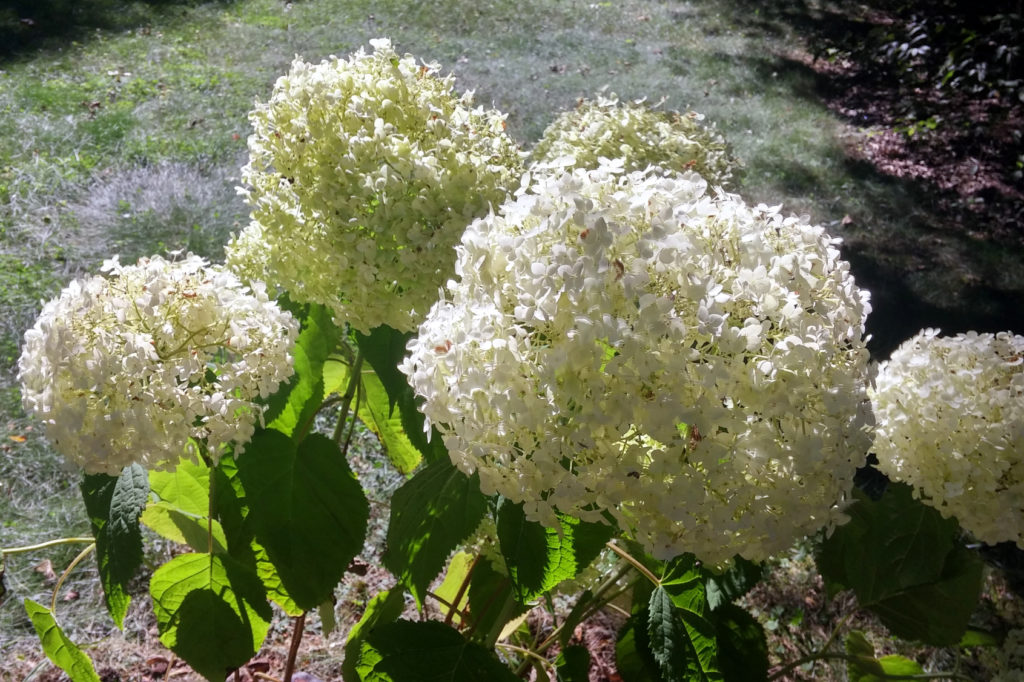
Smooth Hydrangea Note the size of the petals. They are small, much smaller than the hydrangeas you will find in most garden stores. The large petaled hydrangeas are not native to Maryland.
This summer has been busy and hot, and I did not get as much done with my garden as I wanted. I have been at war with some kind of insect (not any of the usual suspects with the usual solutions, I’m afraid) that is eating my roses to death. That rose garden has been nothing but trouble for me since I moved in, to be frank. There’s the insect infestation that will not be subdued, and then the crab grass and weeds are effluvient and eternal. I direct my attention away from it for as little as three days in a row and it’s as if a horticultural apocalypse occurred. But I digress.
Despite the rose/insect/weed problem and the heat (and all the other personal stuff that has no place on my garden blog), I was able to work on three sections of my garden since my last post. My biggest success, however, was finding a wonderful native plant nursery only 30 minutes away from my house. Last month I visited the nursery, and $245 later, well, I had to get these beauties in the ground before they dried up or blew away (weird weather this year, amiright?).
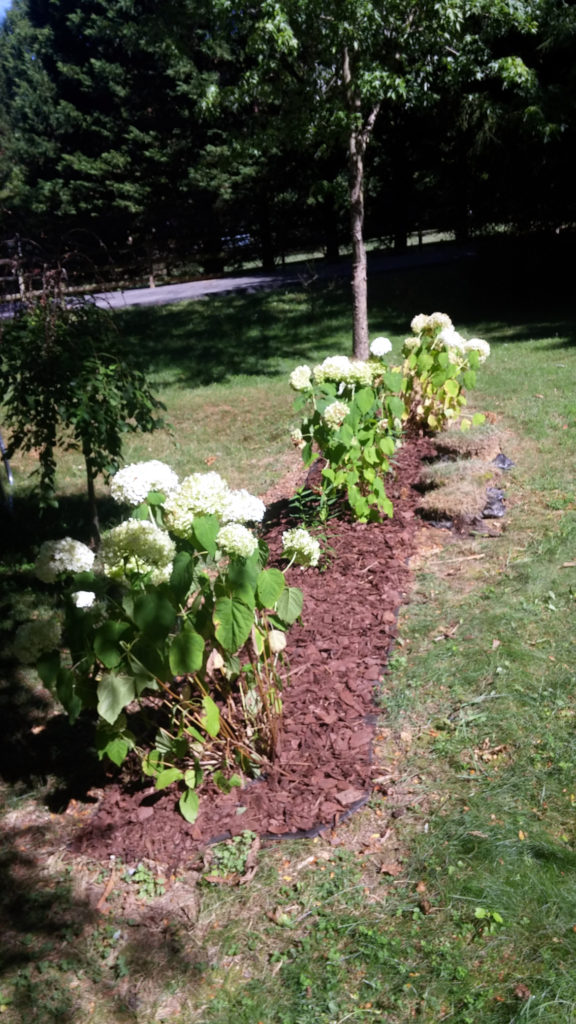
Hydrangea Butterfly Garden The big white puffy flowers are smooth hydrangeas (the hydrangea species native to Maryland). Swamp milkweed and butterfly weed (difficult to see here) are interspersed between them.
You might notice that the hydrangeas are not evenly spaced. This was neither by design nor carelessness. It is due of the presence of large tree roots, the great challenge of planting in a mature landscape. I did not wish to harm any of the nearby trees by damaging their roots, so I had to dig around them and modify my planting schema accordingly. I did say I was going for a natural look, though, right? So this lay-out is, uh, part of that aesthetic. Yeah.
Hydrangea Butterfly Garden
The purpose of this mini garden is to attract butterflies, so I planted three kinds of flowers that should do the job: white smooth hydrangeas, swamp milkweed, and butterfly weed. Though the hydrangeas are already large, the smaller milkweed and butterfly weed should grow to match the hydrangeas’ size in a couple of years.
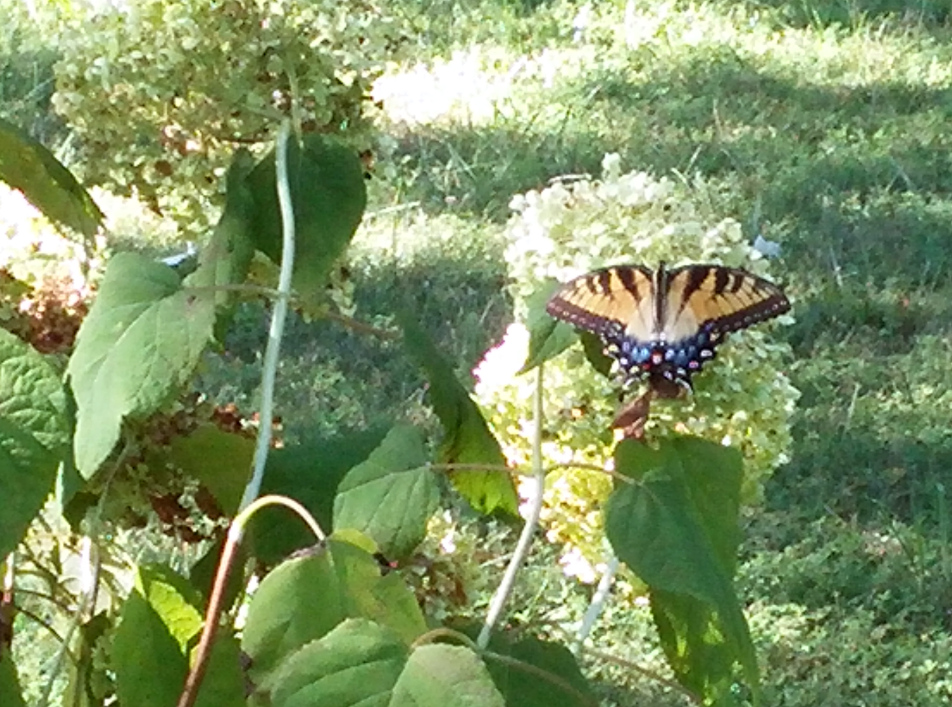
Since planting this garden a few weeks ago we have had many butterfly visitors. Eastern tiger swallowtail, monarchs, and black swallowtails are the ones I know the names of, but there have been others as well. Three days ago I spotted two monarch caterpillars on the milkweeds, so it looks like the next generation will have a home here as well. 🙂
Eastern Tiger Swallowtail perches on a hydrangea blossom.
Two Other Garden Areas
I was also able to plant up two other garden areas, but I don’t have any pictures of them yet. Hopefully I’ll be able to update with pictures in a few days.
In one of these garden beds I’m going for a red and yellow theme, so I planted eastern columbines and cardinal flowers. These flowers are spring bloomers, however, so they are uninteresting at the moment. The other garden bed is where I’m putting my pinks, purples, and blues, so I planted blue flag iris (also a spring bloomer) and gayfeathers (Liatris). The gayfeathers are in bloom and look like something out of a Dr. Seuss book, so I really need to get pictures of them before their bloom season is over.
I like a natural looking garden. I’ve said it before; I’m sure I’ll say it again. I have several garden beds that reflect this love of the wild and untamed beauty of Nature’s own design.
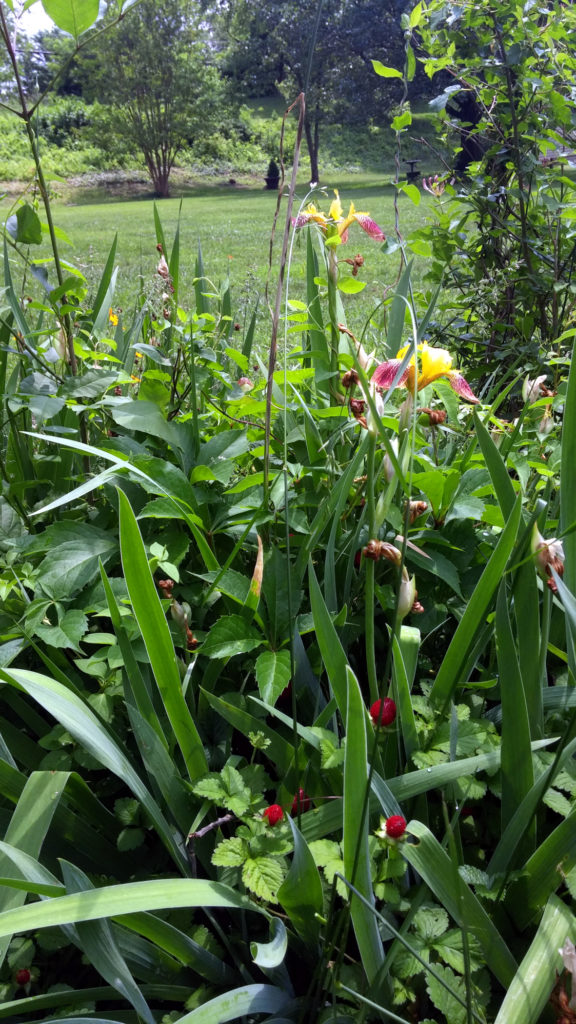
Take this iris bed, for example:
Irises growing with wild strawberries and Virginia creeper. I call this type of mixed garden bed a wilderbed.
The wild strawberries moved in among the irises, and the bright red berries entice the eye in a sea of green foliage that might otherwise be boring. Even though this bed is a bit crowded and in need of thinning, the overall aesthetic of the wilderbed is one I enjoy and admire. The juxtaposition of Order (the green lawn) and Chaos (the wilderbed) offers a high contrast viewing experience. It is to me both visually exquisite and viscerally resonant. To wit:
Order is boring. Chaos is confusing. The two together are magic.
So perhaps you can understand my disappointment when the beautiful vines I found growing up my trees and around my pond and through my wilderbeds were a native nasty that could not be allowed to stay.
Its name?
Poison Ivy
Poison Ivy Oh why, oh why-vy Are you so itchy and so slivy? Did you have to come to my hive-y? Oh, poison ivy. I can’t let you stay alive-y. For your death I must strive-y. Now it’s time to say good-bye-vy, Poison ivy.
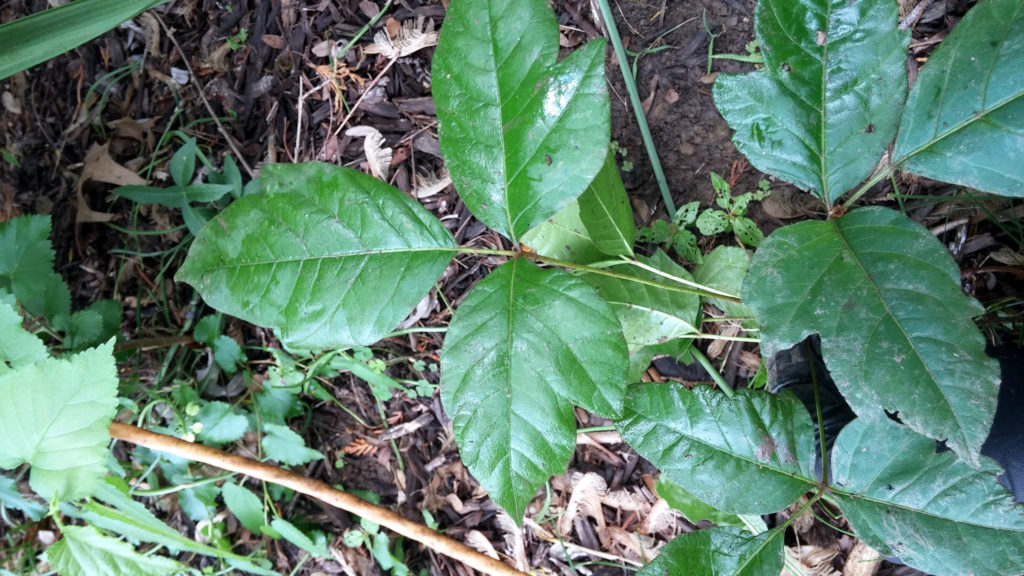
Poison Ivy is a woody vine with smooth OR slightly scalloped dark green leaves that grow in bunches of three (trifoliate) with a dollop of deep red where the leaflets connect. That red is a sign of things to come, for when the autumn sun shines, these leaves turn a brilliant scarlet. Poison ivy is a beautiful plant. Ah, cruel beauty! It’s a shame it’s also hazardous to humans.
Urushiol, a skin-irritating oil, is the culprit. It causes a severe allergic reaction in most people, though about 15 percent of the population are resistant to it. Resistant, not immune. An important distinction. Even if one falls into the lucky 15 percent, repeated exposure to urushiol can weaken that resistance, so it is always beneficial to tread carefully when dealing with poison ivy.
Poison Ivy Disposal
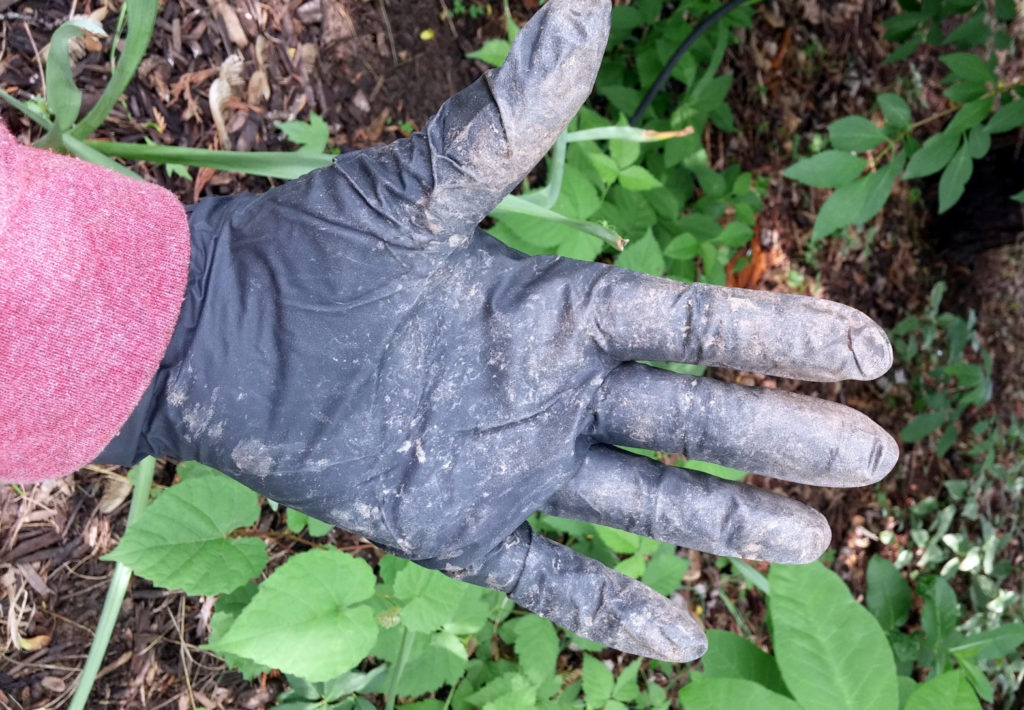
Getting rid of poison ivy is tricky. You don’t want the poison ivy to make contact with any part of yourself. I wore long pants and a sweatshirt (which was too hot for this time of year, but whatever) and latex gloves to pull the devil vine out, roots and all.
Poison Ivy removal get-up
The other aspect that makes removing poison ivy tricky is that it has three highly effective survival properties. Poison ivy 1) spreads by rhizomes (subterranean stems, or creepers); 2) regrows from root clusters (roots that transform into stems, basically); and 3) is propagated by seed. This means that:
1) Poison ivy rhizomes spread everywhere, underneath the soil, so even if you think you got all of it, there is probably more several feet away (ad nauseam). 2) If you do not pull out or kill the entire root, poison ivy will grow back. 3) Even if by some miracle you are able to remove or kill the poison ivy plants in their entirety, a bird could eat poison ivy berries from somewhere else and poop the seeds back into your yard and infect your garden once more. So much fun.
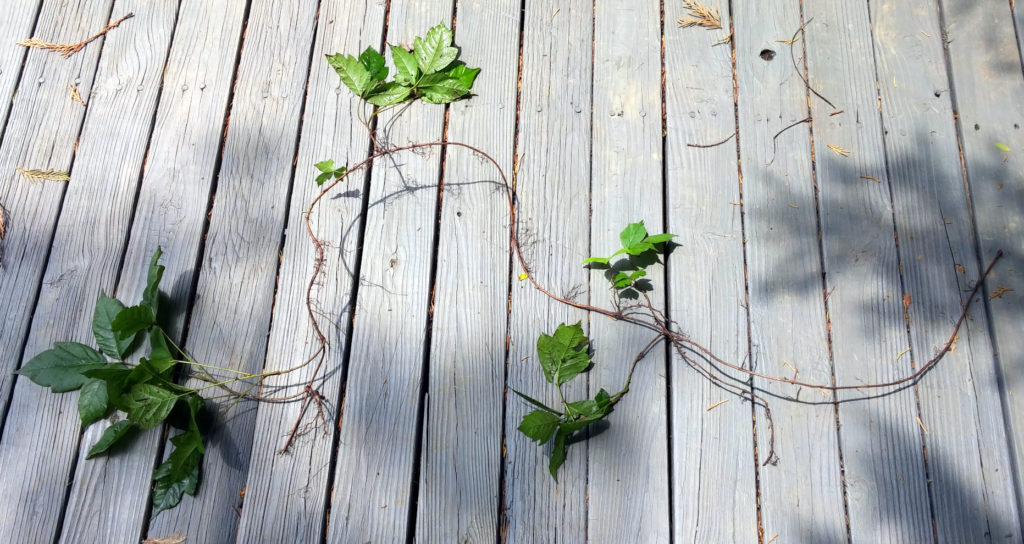
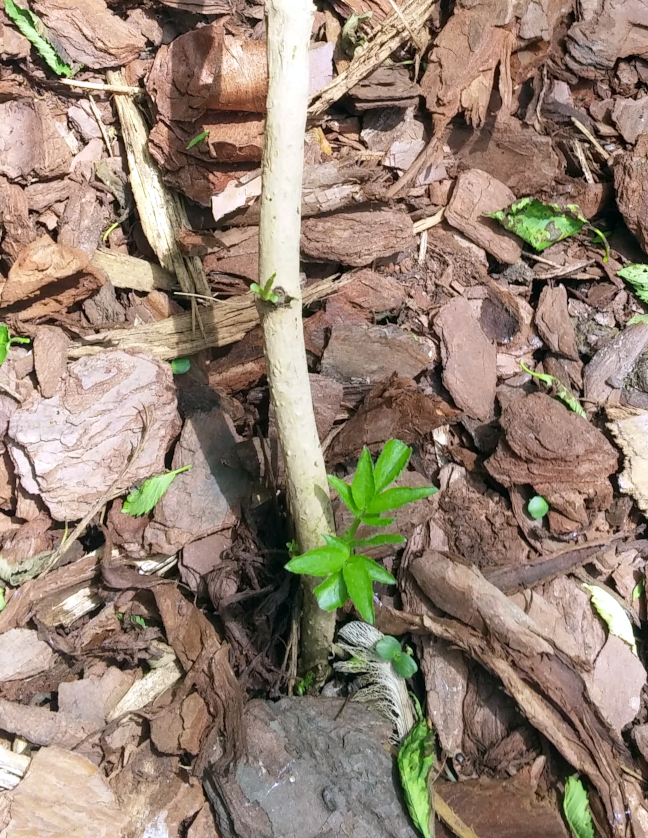
Poison ivy rhizome. Only the bits with leaves were above ground. This was not the longest thread of poison ivy I removed either. I pulled others that were easily three times this length.
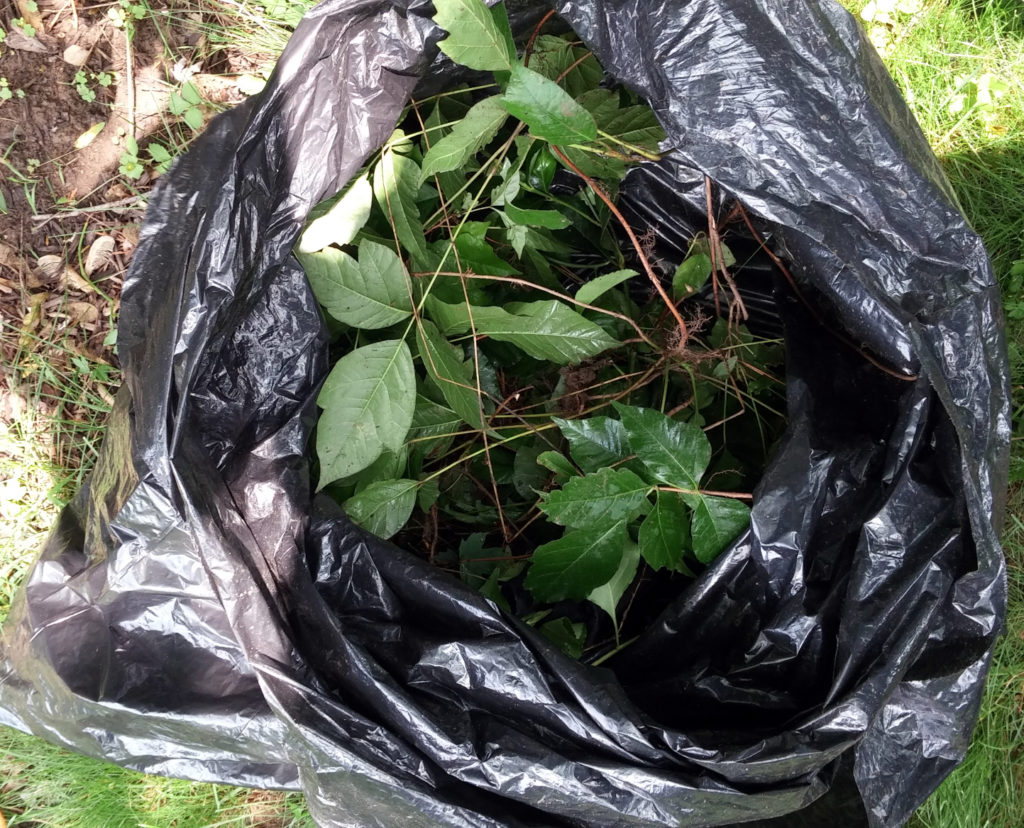
So I decided to brute-force pull up all the poison ivy in my garden. That means I located all the visible leaves; followed the maze of rhizomes and pulled them up; dug around the roots for purchase and pulled them up; and then tossed the remains into a garbage bag because that’s what poison ivy is: garbage. (And because the garbage bag will protect anyone else who comes in contact with it.)
It went to the landfill (vs yard waste pick-up or composting) because I did not want even a whiff of a possibility that the poison ivy will grow back from these cast-offs. I would normally advocate for options that keep landfill waste to a minimum, but this I don’t feel too bad about because poison ivy is organic matter and will decompose in the landfill.
Garbage bag of poison ivy
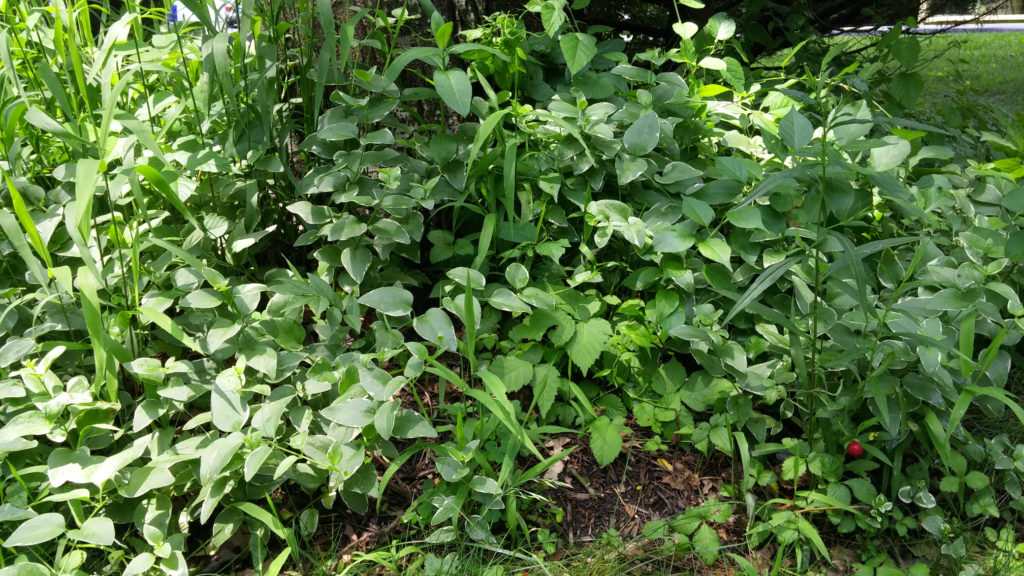
Chemical cures for (killing) poison ivy are available. I chose to stay away from chemical solutions, however, because of the inevitable collateral damage. Poison ivy likes to grow in areas like the one pictured below, and because of the twining, twisty, tricky, sticky way poison ivy grows, I did not have confidence that the killing agent would affect ONLY its intended target and NOT KILL the plants I wanted to keep.
One of the wilderbeds where I found and removed mounds of poison ivy that had sinuously infiltrated every square foot.
Creepers Worth Keeping
Poison ivy is not the only creeper found in gardens, and some of them are worth keeping. Wild strawberries are one. I’ve mentioned them already. I love wild strawberries and encourage them to grow throughout my garden.
Virginia creeper and wild raspberry are others. Both are often mistaken for poison ivy, and many a gardener ends up pulling them out too. If you are going for a cleaner, more controlled aesthetic, or you have some plantings that can’t be crowded, then sure, pull them out when you find them. But if, like me, you want that natural look and are inclined to vines, then you can’t go wrong with Virginia creeper and wild raspberry. They make great additions to the garden and provide that hint of chaotic interest that I am so fond of. They do require thinning from time to time, however. Otherwise they might choke out anything less robust than themselves.
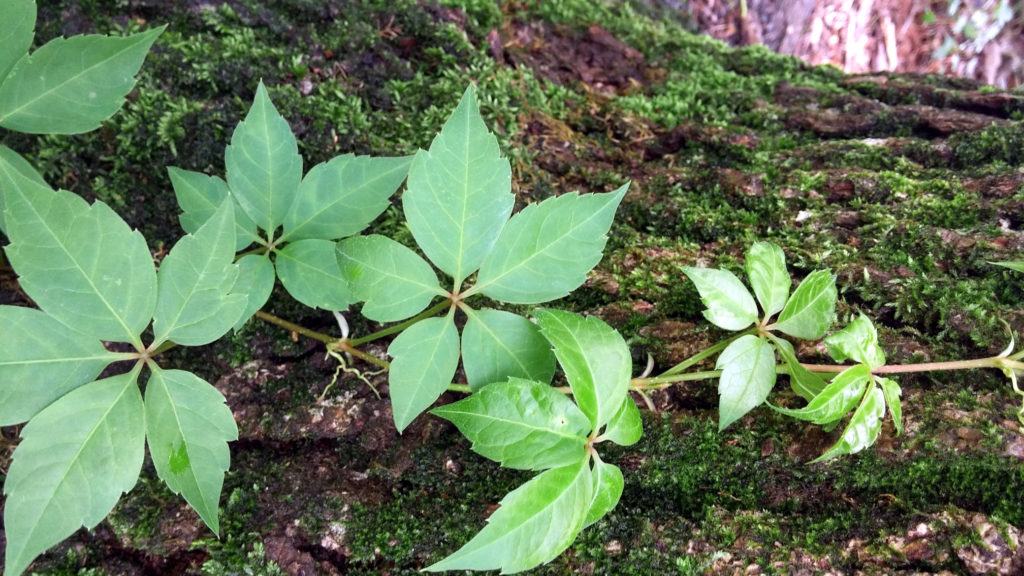
Virginia Creeper
Growing on the side of the moss covered trunk of a sweet gum.
Note the shape and color of the leaves. They are almost identical to poison ivy, and it is easy to see how Virginia creeper could be mistaken for its more toxic cousin. However, Virginia creeper leaves grow in groups of five (quinquefoliate), which makes it easy to distinguish between the trifoliate poison ivy. Like poison ivy, Virginia creeper’s autumn transformation is quite stunning, going from green to bright red.
Now a small word of warning; Virginia creeper is part of the grape family and does produce berries that are harmful if ingested. Likewise, the rest of the plant contains raphides, which can irritate the skin for some people.
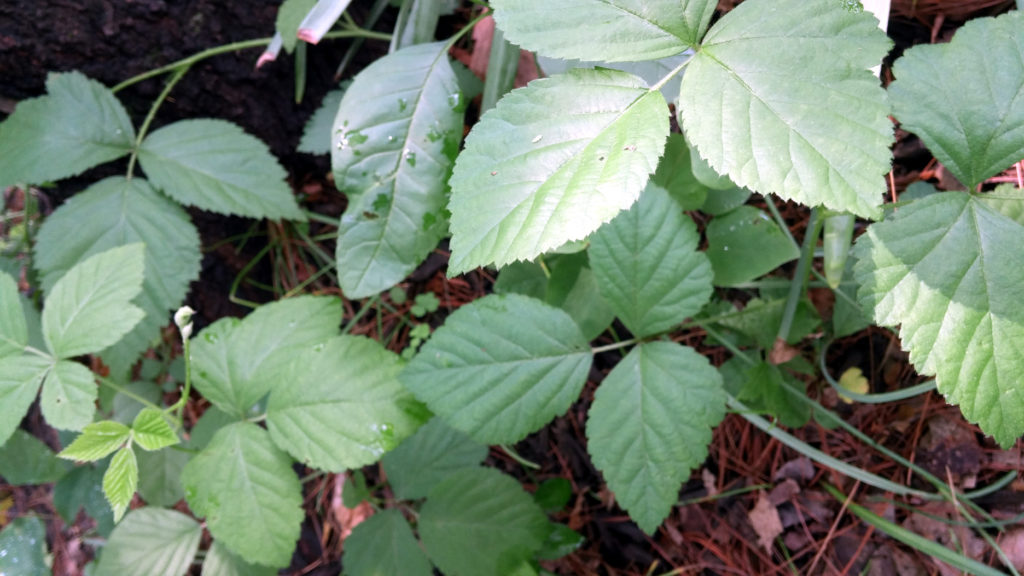
Wild Raspberries
Wild Raspberry Leaves
Cluster of three leaves: check. Creeper: check. Green: check. Grew out of nowhere: check.
The similarities to poison ivy are many. However, wild raspberries are usually a lighter green than poison ivy (though young poison ivy leaves are lighter than their mature counterparts). Wild raspberries can have clusters of three or five leaves, and those leaves are toothed, or serrated, unlike the smoother scallop of poison ivy. The biggest difference between the two, however, is that wild raspberries have what most people refer to as thorns.
Botanically, pedantically, these “thorns” are really prickles and are differentiated from proper thorns in that prickles sit on the surface and are a feature of the plant’s epidermis or bark whereas thorns are modified stems.
TANGENT: Raspberries and roses are in the same family (Rosaceae). That means (you guessed it) that roses don’t have thorns either. That’s right, roses have prickles. But for practical purposes, it’s okay to call them thorns. We all do, even those who know better.
The berries each produce are also quite different from each other. Wild raspberries can range in color from white to yellow to red to black. They look plump and inviting. Poison ivy berries are small, gnarly, dumpy whitish, and look disgusting.
I’m looking forward to autumn. I can’t wait to enjoy the fruits of the wild raspberries and the bright red bursts of the Virginia creepers. But for now, I’m happy with the wilderbed Mother Nature and I created. It has a summer woodland glade aesthetic that is free from poison ivy. For now.
Although all of the bare root trees I planted have sprouted leaves now, I decided not to include pictures of all of them for two reasons: 1) repeats of the same kind of tree are extraneous; 2) due to the surrounding greenery, some of the sprouting foliage blends into the background and cannot be seen well anyway. (I guess a distant third would be that I’m saving myself time and effort. Shhh.)
REDBUD
The redbud on the hill. Its heart-shaped leaves give good shade throughout the summer and fall. In the spring, we’ll see profuse reddish purple blossoms.
ELDERBERRY
Elderberry produces white blossoms with a sweet, herbal scent. These elderflowers are followed by berries often enjoyed in preserves and pies, and by birds. It’s hard to keep the birds away from elderberries. I don’t try to.
I love trees. When I was a child, I lived on a street named after a tree. (I won’t name the street because I think it’s one of those security questions online banking etc. use for security purposes. I don’t choose that question, in case anyone is thinking of snooping out my life and trying to break into my bank account or something ((you’ll be disappointed with what you find there anyway)), but I thought I’d keep the information private all the same.)
So I lived on a street named after a tree, and my house was the only house on the street that actually had the name-tree (two of them!) growing on the property. I thought this meant that the street was named after my house, and I felt very special. I know now that my trees didn’t have anything to do with the naming of the street, but I wouldn’t take that memory away from little me for all the tree-fame in the world.
I love trees. I know I mentioned this already, but I repeat it because I really really love trees. Really. So perhaps you will understand why I planted ten more in my backyard garden, and have plans to plant three more soon.
Holly Trees Three
We are the holly trees three. Plus a fourth, a wee pine tree.
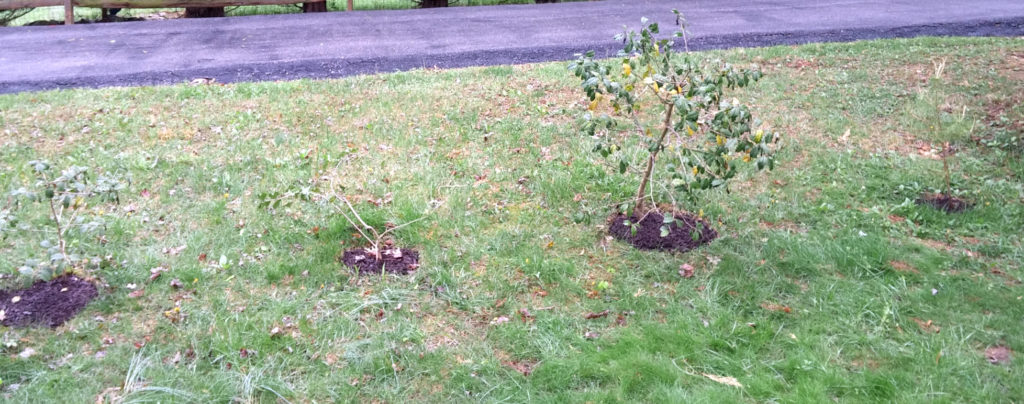
In April I took my family to visit my in-laws. They have a lovely property that contains a wooded area by a pond with beavers. I mentioned how much I like hollies (I know they are pokey but sometimes beauty hurts, what can I tell ya?). They have a plethora of American Hollies (native holly species) growing in their back wooded area and welcomed me to take as many as I wanted.
Well, I did. Let me tell you it is difficult to dig out trees growing on a slanted hillside made of rock and clay. Doing this while also preserving their root systems is close to impossible. I managed to get about seven tiny ones and the three larger specimens you see pictured above. I planted them in the hopes they will grow into a green fence. I am a little worried they might not survive the trauma of transplantation. I applied some mycorrhiza, a fungus that promotes root health/growth in trees, and hope for the best.
I planted a few of the tiny hollies in gaps between the red cedars on the back hill. Sometimes deer use those gaps as a pathway into my garden, so I hope the hollies will discourage the deer from entering. It’s a long game I’m playing, though. In a few years the hollies might make a difference. Or something else will have eaten them. We’ll see.
The sweet little pine tree pictured on the far right deserves mention. I don’t know what species it is, but it is native. I have to do a little more research to find out more about it. I liked it a lot, so I took the little fella with me, and it’s doing quite well. I have high hopes for its survival.
Bare Root Trees
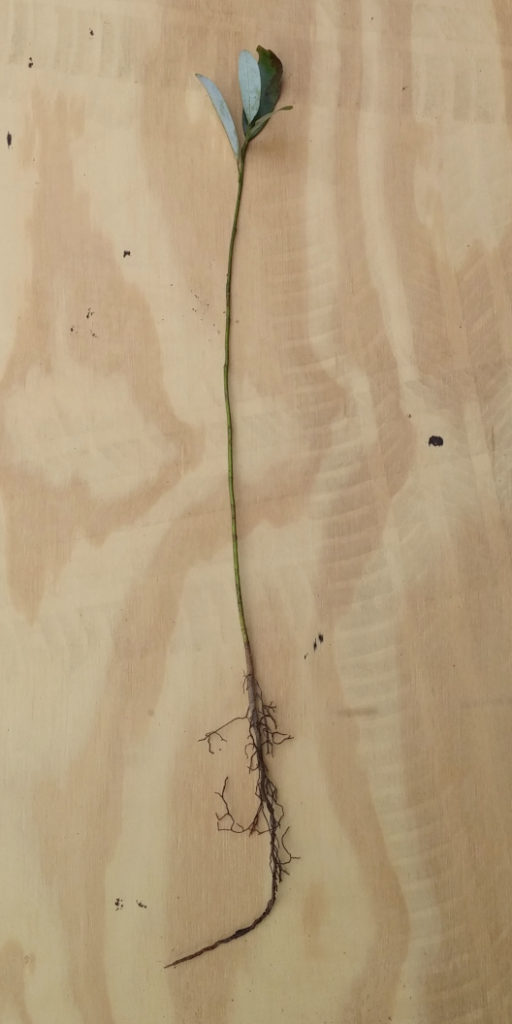
Sweetbay Magnolia
My mother-in-law (MIL) is a member of the Arbor Day Foundation, and every year they have a bare root tree sale. Bare root trees are precisely what the name implies: trees that do not come in soil. They are usually grown from seed or cutting in water or soil from spring to fall, then removed from the soil/water when they become dormant, frozen for the winter, and then taken out of the freezer the following spring. One should plant a bare root tree within 24 hours of getting it, but the sooner the better. The Arbor Day Foundation was selling local native trees, and MIL asked me if I wanted any. Of course I said yes, and I picked them up while I was visiting.
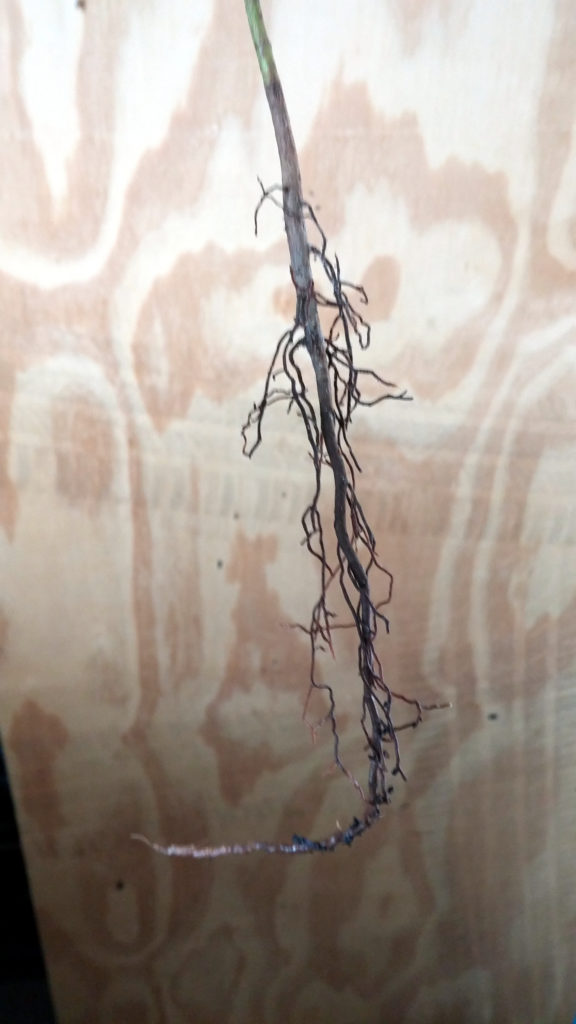
Close up: bare roots of a sapling.
The sale had many trees on offer. I chose: American Elderberry x2, Redbud x2, Sweetbay Magnolia x2, and Dogwood x1 (I would have gotten more if I could; I really like dogwoods, but apparently so does everyone else).
I planted six of the seven trees. Four of them are budding out now, and I believe they will thrive. The other two… well, they may not make it.
I held one tree, a magnolia, in reserve because I want to plant it in the side yard where a dead tree currently… uh, lives. I have to remove that dead tree before I plant a new one, which should be happening in a few days. Yay! Right now the magnolia is in a pot, biding its time. Your time will come, magnolia. Your time will come.
The garden of this house is what first attracted me to it. The yard was large, private, mature, and a little neglected. It had what people like about old, run-down houses: good bones. I knew I could do a lot with the space. But first it was going to require some clean-out, some trimming, some pruning, some removal of dying shrubbery and overgrown clumps of mess. I also like to start the compost bin as soon as possible, so that in a year or so when I need it, it will be ready.
I started the clean-up as soon as I moved in, even before I conceived of this website and blog. That means that some of the photos I post here about the prep and clean-up will be chronologically out-of-order. I don’t think this is a big deal, but I did want to acknowledge it. For example, the BEFORE PICTURE of the garden was taken AFTER I did a lot of the clean-up, tree trimming, and other pruning.
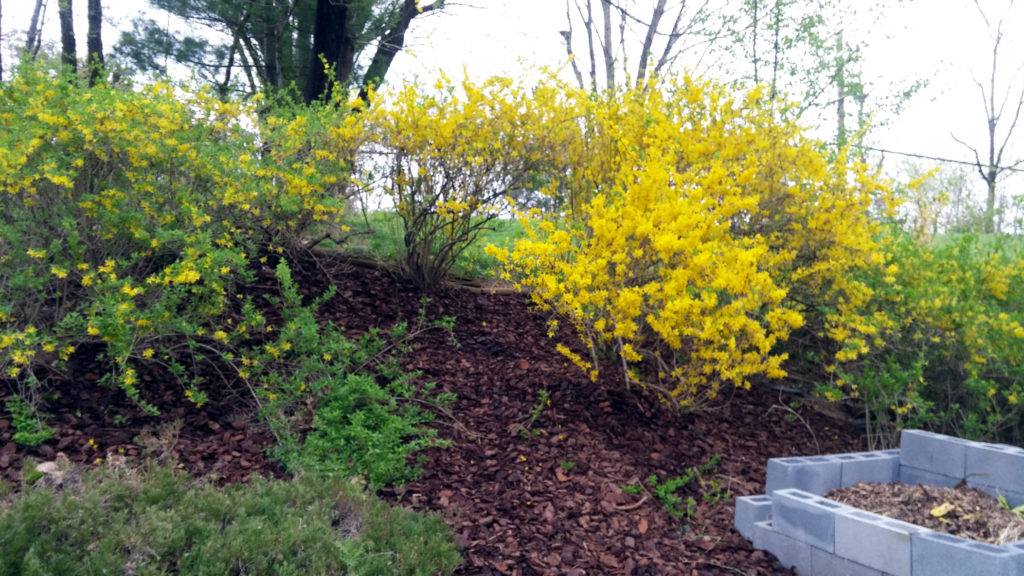
But there was still plenty to do this spring. Part of getting a new garden is finding out what, exactly, was already growing. I was pleasantly surprised to find that the old crusty bushes in the back were forsythia, an early blooming bush with yellow flowers.
Old and Crusty Forsythia
I decided to keep the forsythia. Early bloomers are good for bees. I trimmed the old growth and mulched. Here is the result:
Trimmed and Mulched Forsythia (with a sneak peek at the compost bin)
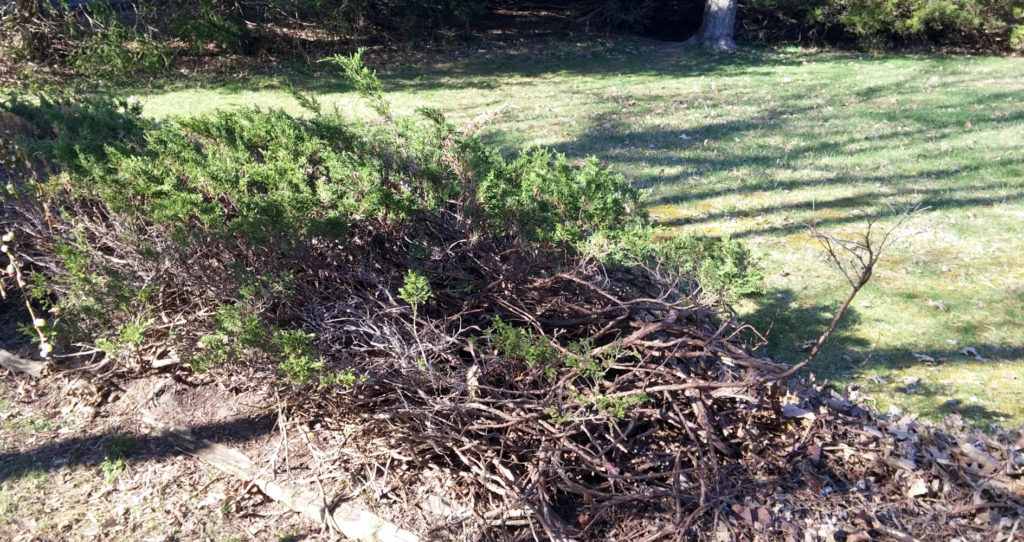
Not every set of bushes was so fortunate, however. The row of mostly dead red cedars in the middle of the grassy yard had to go. Red cedar can be a beautiful evergreen, but these ones were a tangled mess.
Because the red cedars were mostly dead they were easy to pull out without any specialized digging equipment
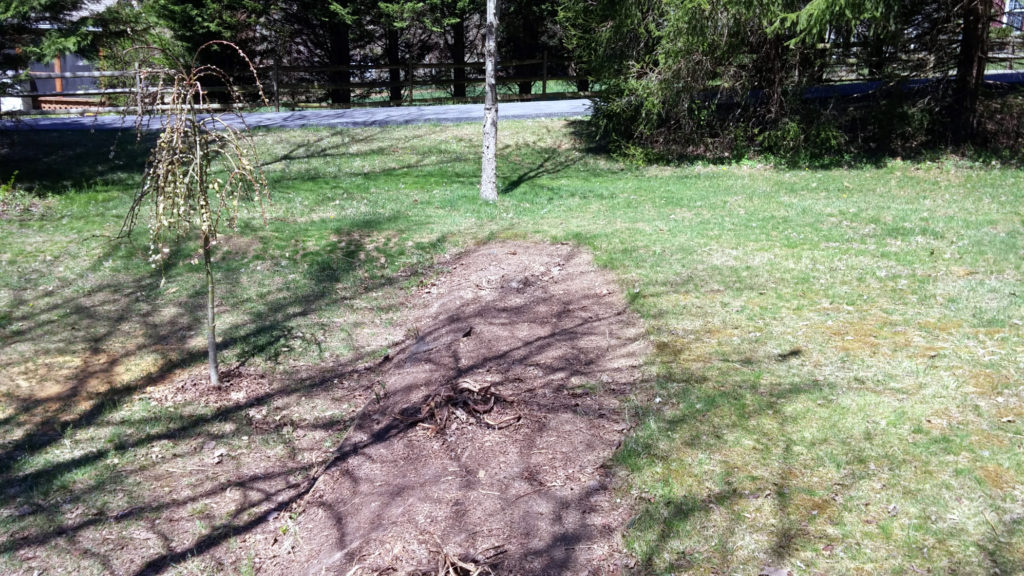
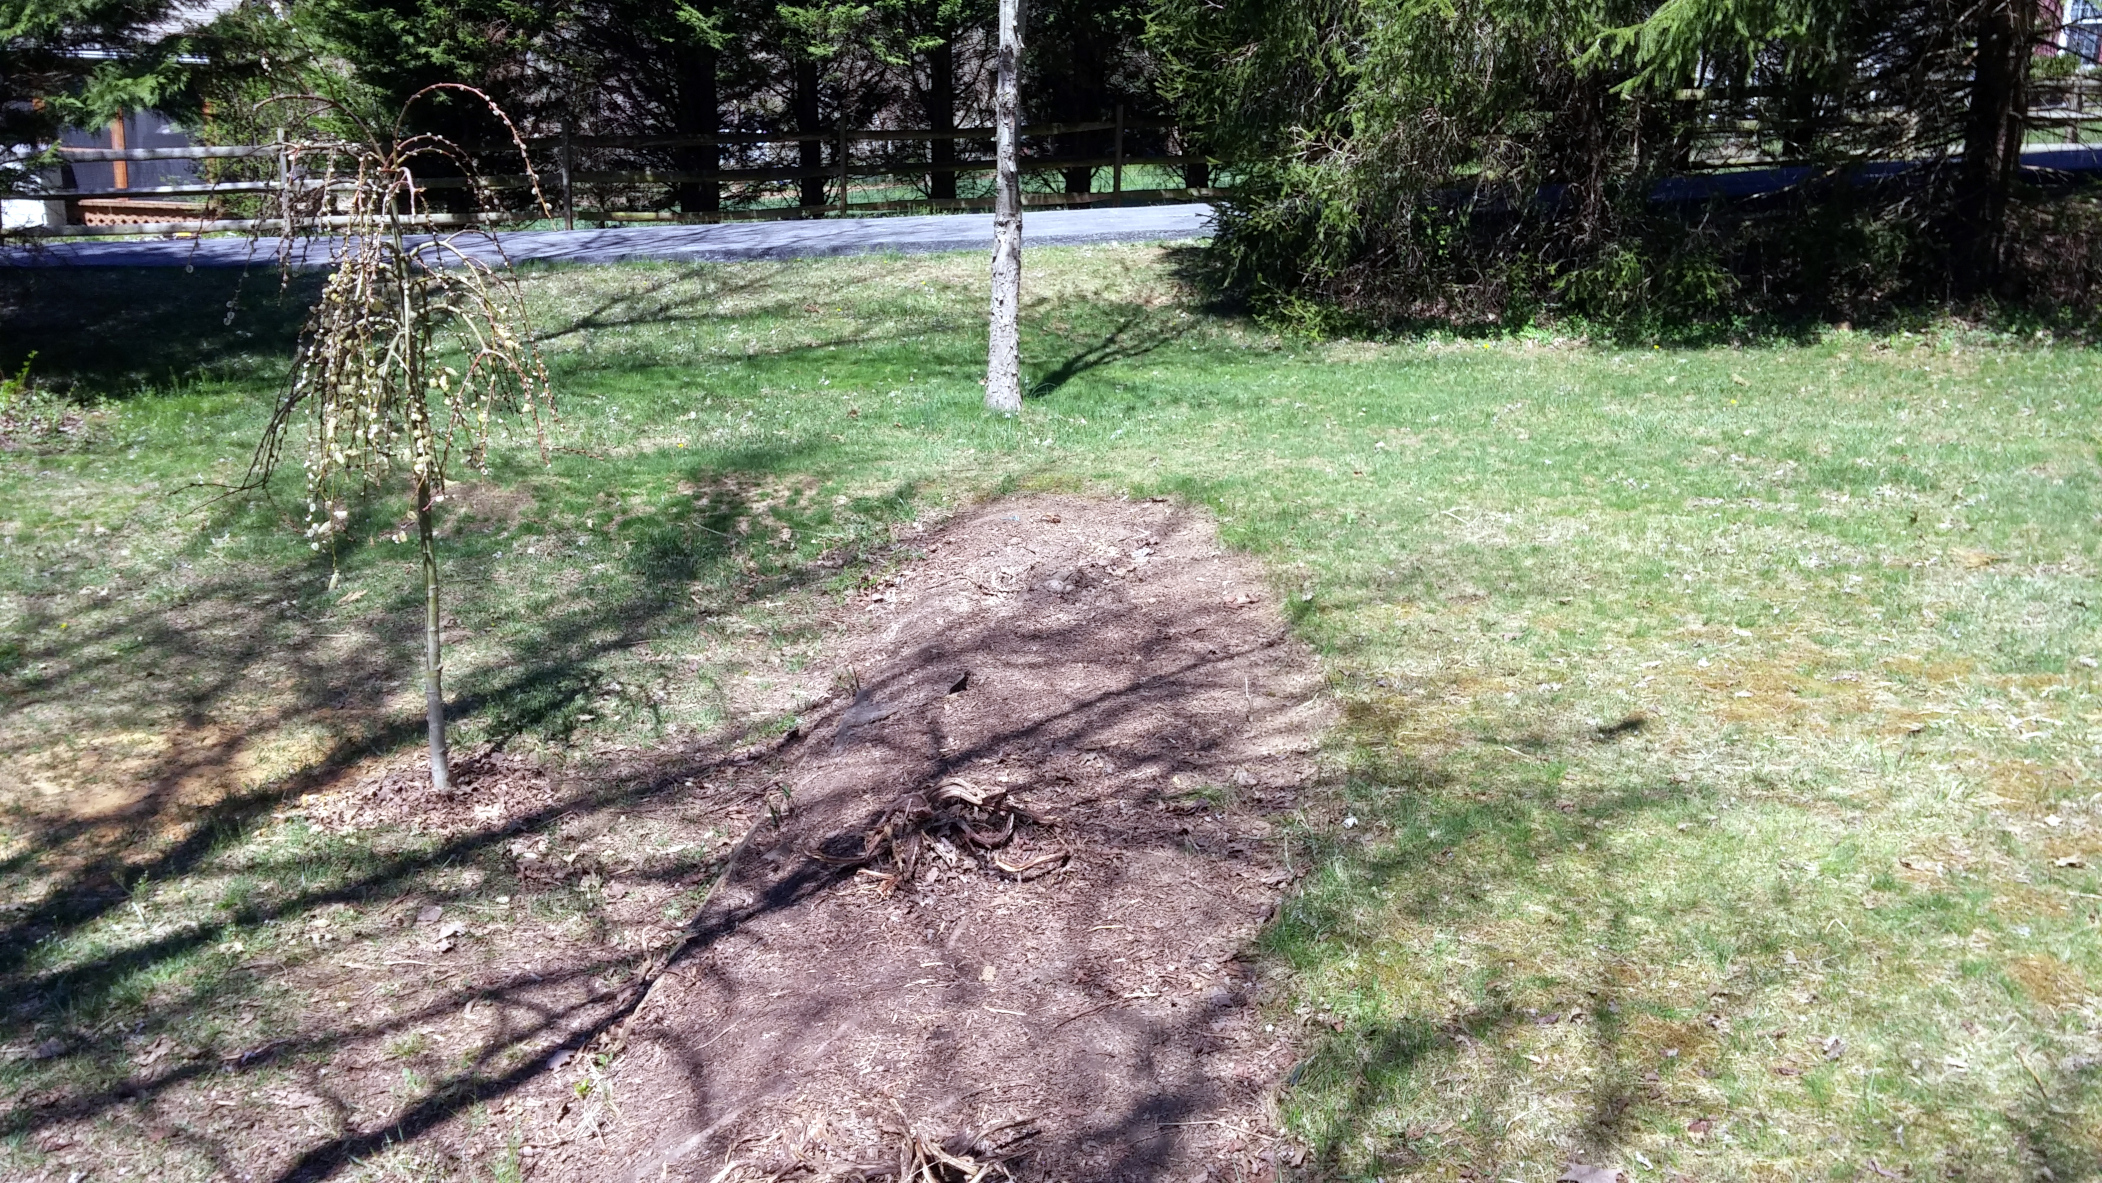
Here is the result, plus a bonus: a weeping pussy willow.
Hurray, the bushes are gone! Bonus: a weeping pussy willow (left) I planted at the same time.
I love weeping willows. As a child I dreamed of having a weeping willow fort to play in. Now my children will be able to realize that dream. I’m not kidding myself, though. I know for whom I planted this tree, and I know who is going to spend the most time playing under it. Me.
My kids are welcome to join me if they wish.
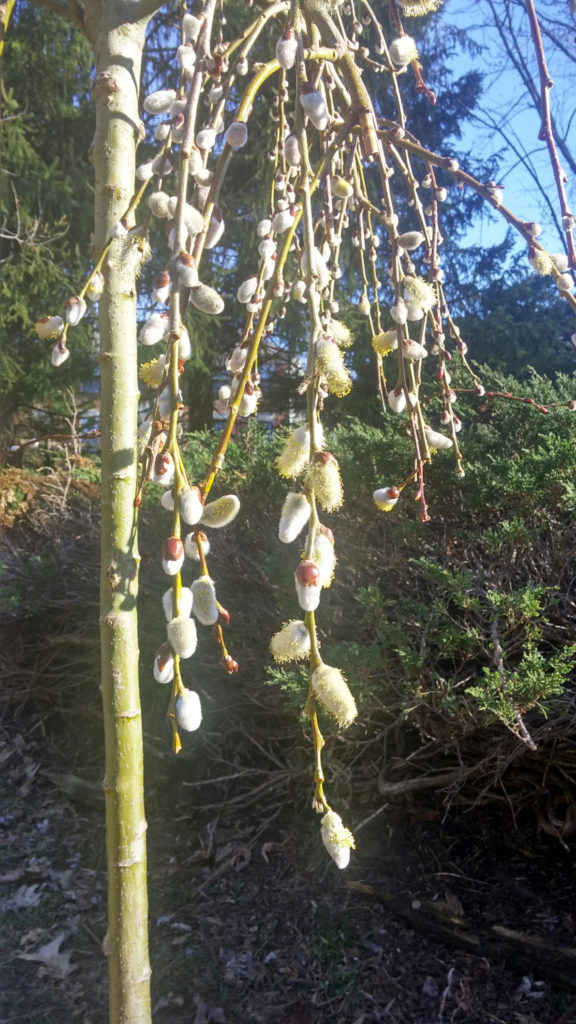
The weeping pussy willow is in bloom. The yellow fuzz around the furry catkins (what gives the pussy willow its name) are the flowers. The yellow color of the flowers tells us that this tree is male.
A weeping pussy willow is not a natural tree. It’s a graft. Weeping willow roots are topped with a pussy willow bush, and the two are grafted, or grown, together. The roots determine the structure, and the bush determines the look of the foliage. Horticulture is so cool.
As I mentioned in a previous post, I am going for a natural garden with primarily local or native species. There will be a few exceptions, and this weeping pussy willow is one of them. It was not part of my original plan, but I found this beautiful specimen on sale at the garden store when I was picking up compost bin construction materials and mulch, and I just had to have it. I did have to alter my overall plan to accommodate this tree (willows are fast growing and can grow to 50 feet in height), but my plan is flexible. This garden is for me, and if I want to follow a whim I may.
In addition to the prep and clean-up, another labor-intensive phase 1 step is building the COMPOST BIN.
Composting is a great way to enrich soil without having to buy a lot of fertilizers and so forth. You use plant-based food scraps and other garden discards like leaf litter, mash them together, turn the mess occasionally, and let the worms do their thing. In a few months to a year, the organic mess will become beautifully enriched garden soil.
There are many commercially available compost bins. None of the ones in my price range were big or robust enough. My backyard garden backs to the woods, and I have a lot of creatures who visit my garden: deer (of course), squirrels, rabbits, a groundhog, at least one gray fox, and tons of birds. These I have seen with my own eyes. My neighbor told me that he has seen a raccoon snooping about as well. The birds and squirrels aren’t the issue. The rabbits, deer, groundhog, and raccoon (especially the raccoon), are a different story. I need a compost bin that is sturdy enough to stand up to a raccoon.
Cinder blocks are my construction material of choice. They are beefy and cheap and allow moisture and air (necessary compost ingredients) to enter. They are also ugly, but I’ll deal with the unsightliness later. I chose a rectangular plot of land close to where my productive garden will go, and I got to work leveling it. It took a lot of digging because it’s situated on an incline. Why did I choose a spot on an incline? I can’t remember. Oh, right, so that I could utilize all the surrounding flat area for the actual garden beds. Sigh. After all the digging, it was time to start stacking. Cinder blocks are heavy!
The Compost Structure (not exactly a bin, is it?)
I chose a design with two sections. I like having at least two sections because one is the side I add to, and the other is the side I take from. That way, once composting is well established, I always have some ready to go and some cooking in the wings. I also like having my bin open to the ground so the worms can come on their own. The rotating barrel style bins require special additives to get the break-down started, and that’s too annoying for me to deal with. I also have plenty of space to build a structure. For those short on space or permission (renters) the barrel type could be ideal.
I haven’t finished building my compost structure yet. When I do I’ll post a picture. Partially finished, it’s working okay for now. I cover it at night with a chicken wire frame, which keeps any curious critters from contaminating the compost.
Two trees were also removed (yay, chainsaw work!), and two more need to come down. Although I worked as an arborist many years ago, I lack the safety equipment to take these two bigger trees down on my own, so I may need to contract a professional. I’m still assessing that.
And with that, Phase 1 is pretty much complete. While there will be more prep work to do as time goes on, that’s it for the big stuff.
It’s always good to start with a plan. My backyard garden plan has four phases. It’s ambitious, and because I am doing the work myself it will take between four and six years to complete. The plan is also subject to change, depending on several factors, foremost is cost. I’ve got a strict budget, but since I’m doing the labor myself I can spend the money on things like plants, which will be nice.
THE FOUR PHASES
Phase 1: Prep and Compost Phase 2: Green Fencing, Pathways and Hardscaping Phase 3: Productive Garden Phase 4: Decorative Garden
The main idea or concept for my garden is natural wilderness. I plan to use primarily native plants for the decorative portions. I want my garden to look spontaneous, as though everything just happened to grow that way, but showcasing the most interesting features of each plant. I also want to promote and attract local wildlife, like butterflies, bees, birds, etc.
However, I will include some non-native species, like clumping bamboos and willows for the green fences. This is important because I don’t want the deer to eat them. Deer are probably the biggest pest known to home gardeners, and they deserve an entry of their own. Suffice it to say, my plan is geared towards reducing their access to my yard. It’s difficult to make anything deerproof, but smart planning can help.
Before starting any project, it’s important to contact Miss Utility for your area. Miss Utility is the government program that keeps track of and marks all underground infrastructure like water mains, cables, electric and gas lines, etc. You definitely don’t want to damage any of these essential services. I contacted them a few weeks ago, and they have since come out to my property and marked everything. In my case, I only have one line to worry about, an electric line that runs from the back of my house to my neighbors. I have notated the placement and am now ready to start.
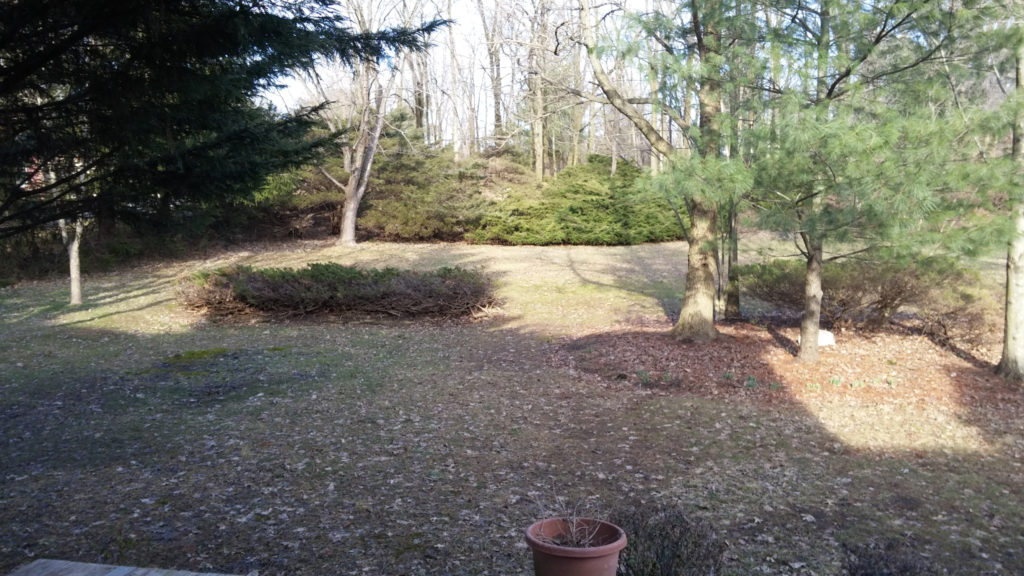
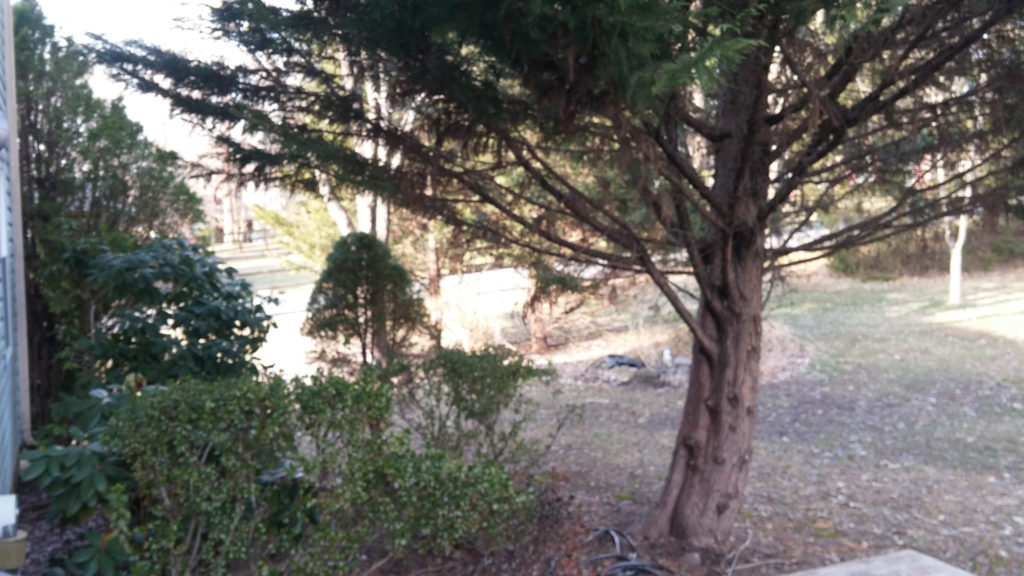
The BEFORE PICTURE: The backyard as I bought it, reflecting only minor changes that I made to it.
This is my backyard. It’s got some good bones. The mature trees are, for the most part, quite lovely. There are several maples, a sweet gum (my children love collecting the spiky seed pods, they refer to them as korok seeds from playing Zelda: A Breath of the Wild), a few pines and other conifers, and a tree with compound pinnate leaves that I don’t know the name of. In the far back there are some nice red cedars as well. I’m trying to forget about the ugly scraggly bushes in the center. They will be coming out anyway.
Please forgive my lack of photography skills. This picture was taken at the wrong time of day. Even I can see that. However, this photo is one of three (the other two will appear shortly) that I took before I started working on the garden. It reflects, for the most part, the starting point of my garden. It was taken in February of this year
I should mention that last October I planted over 100 spring bulbs. If you look in the leafy mulch area under the trees on the right hand side of the picture, you can see some of the green tips of the daffodils emerging from their winter slumber. Unfortunately the squirrels dug up the hyacinth, tulips, and most of the crocuses. Daffodils might be the only spring bulbs I get in the back.
Here are the daffodils now. Six weeks makes a big difference.
Back to the starting garden photos: I have two more areas to show you, the back-left and back-right.
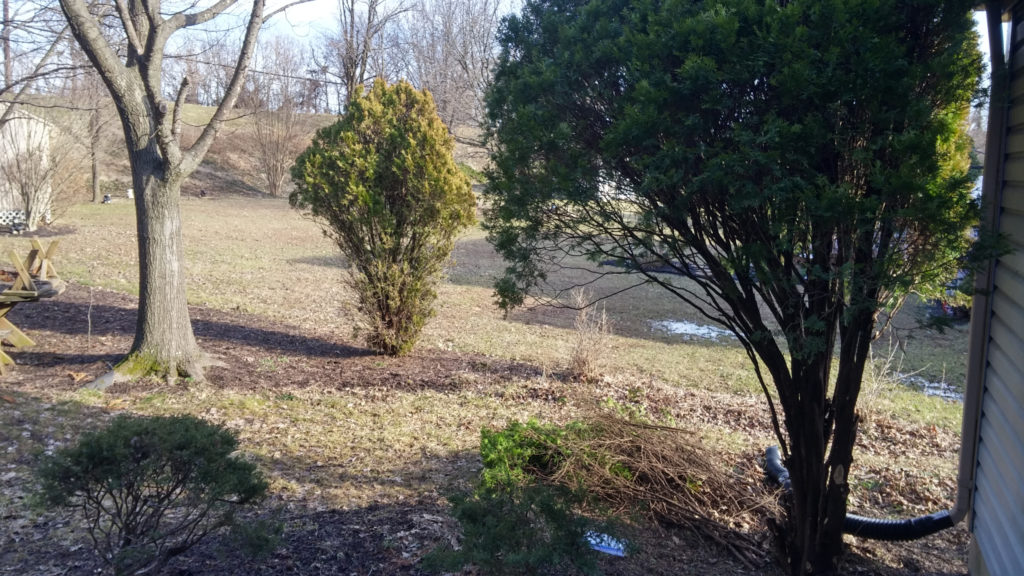
Back-Left SideBack-Right Side
The tree you see in the foreground of the back-right side picture is a juniper bush, which I trimmed. I wanted to open up the center a bit so that birds could perch there. It’s right outside my window, and I like to see the cardinals, nuthatches, and mourning doves that are regular visitors. I also prefer the tree shape to the bush shape, and the branches no longer scratch the siding on my house, so win-win-win.
The juniper tree beyond it (well-lit) is also in need of trimming, which I plan to do soon. In fact, every tree is in need of trimming, and I have spent a goodly amount of time working on that. I don’t have all the safety equipment to do the really tall stuff myself, however, so I might have outsource some of the tree care. I plan to do as much work as possible myself so I can save my budget for the plants themselves, but even I can’t do everything.
I have my work cut out for me, but I like outdoor work. It reminds me of my wild childhood, and it feels more like play than chores. Perhaps that is why I love gardening so much. Nature is calming, and I take joy, not only from the end result, but from the process as well.
For the past ten+ years I have helped others create their gardens, and now I get to do my own. Watch as I transform my back yard into the garden of my refuge and joy.


